10.3.1 general
10.3.2. Order of licenses
10.3.3. Manage license count
10.3.3.1 increase license number
10.3.3.2 Cancel subscription
This chapter describes how to order M365 and software licenses and how to increase and decrease the number of licenses.
2. license management – ordering licenses
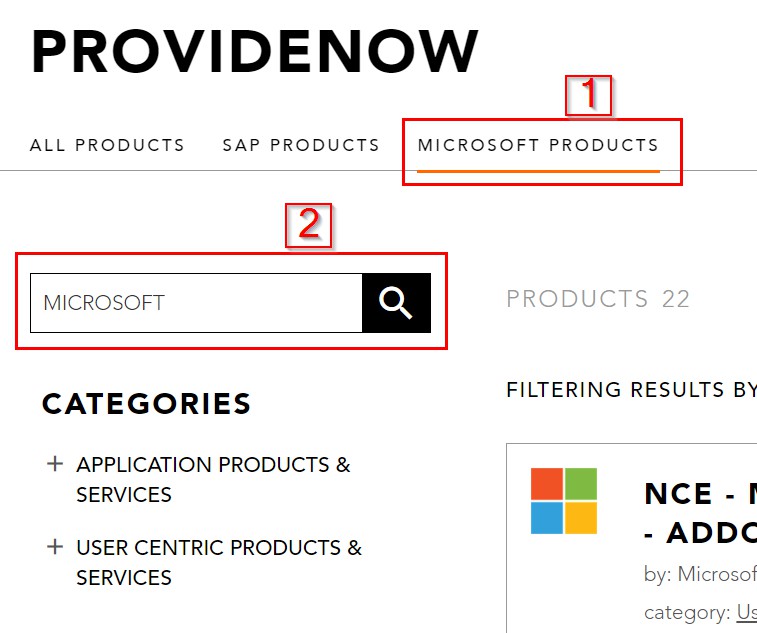
After you have logged in to the provideNow portal, you have several options to order your desired license. You can search for your license in the corresponding product category or find your license directly via the search. In the following it is assumed that you want to order a NCE – MICROSOFT 365 (ENTERPRISE) license.
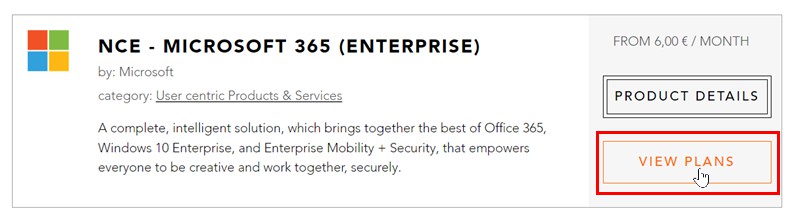
After selecting the desired license (in this case: NCE – MICROSOFT 365 (ENTERPRISE)), click on „View plans“ to see the corresponding license specifications.
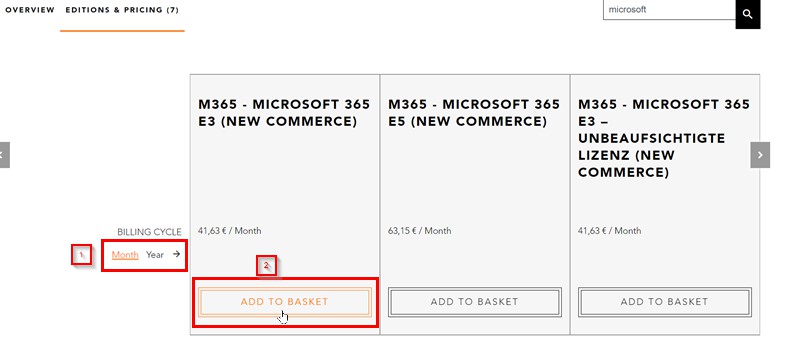
You will now see the different features and the addons that you can book for the product. Before proceeding to the ordering process, you can select the billing cycle (month or year). To order the license, click on „ADD TO BASKET“.
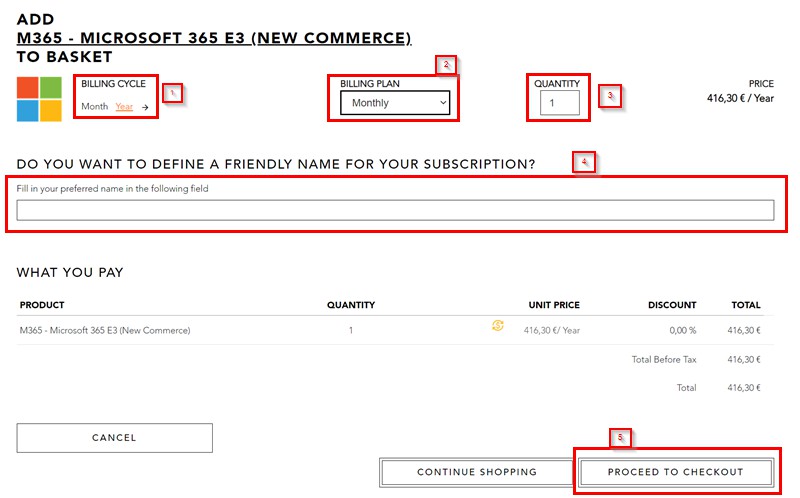
In the basket you now have the option to select the billing cycle. If you select an annual subscription, you have the option to set a monthly billing. You can also customize the number of licenses to order and give your subscription a personal name. To complete the order, click „Proceed to checkout“.
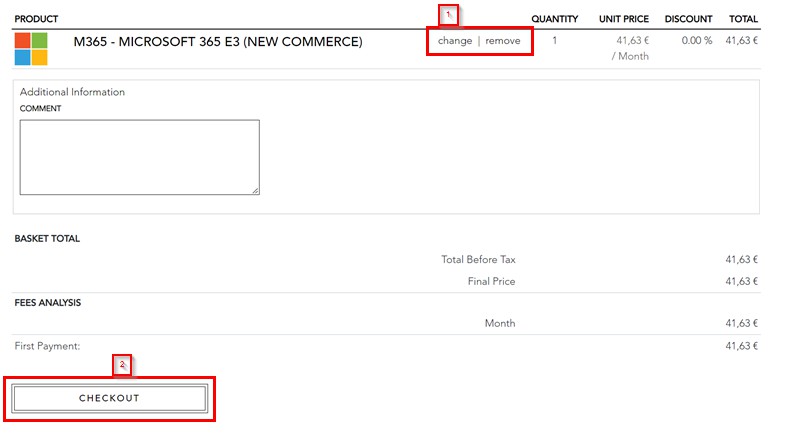
In the checkout process you have again the possibility to validate your order. If your order is ok, you can click on „Checkout“.
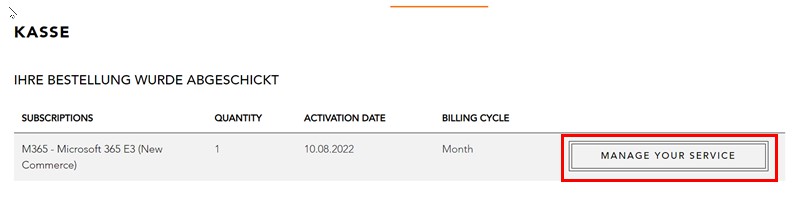
After you have gone through the checkout process, your license will be provisioned. Click on „Manage your Service“ to assign the license to your end users.
10.3.3. manage license number
This chapter describes how to increase the amount of your licenses or cancel the subscription.
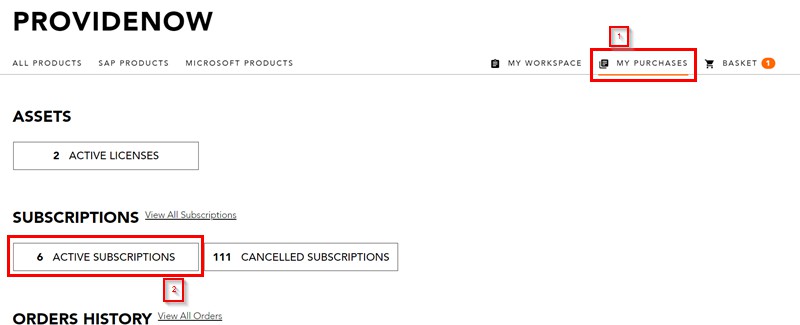
To do this, please click on „My purchases“ and then on „Active subscriptions“..
10.3.3.1 Increase the number of licenses
To increase the number of your licenses click on the appropriate subscription.
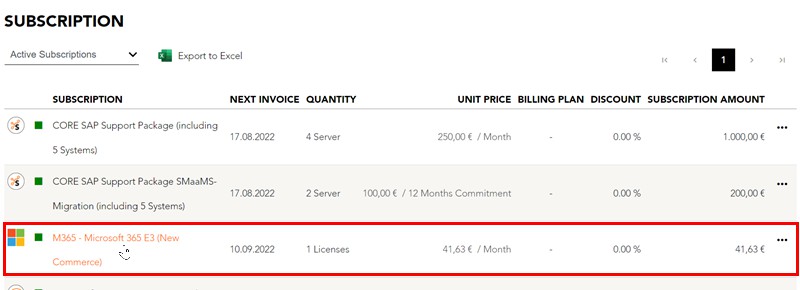
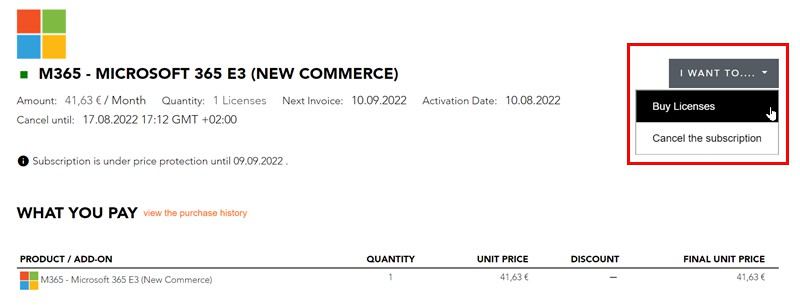
After you have selected your subscription, click on „I want…“ and then on „Buy licenses“.
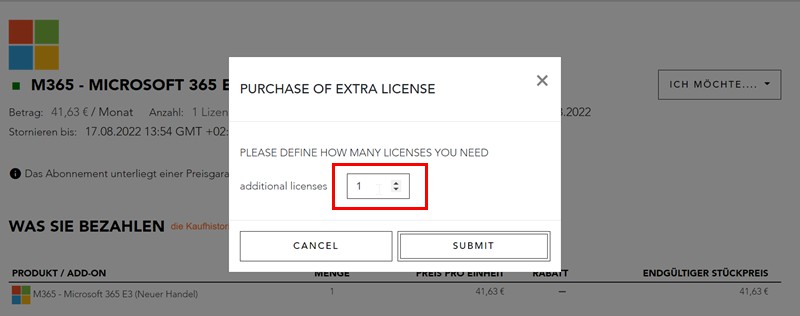
Now you have the possibility to order additional licenses here.
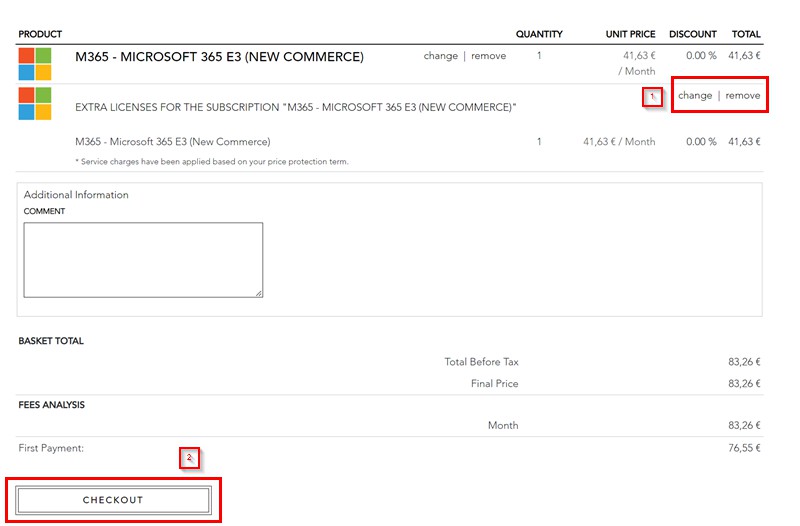
In the checkout process you have the possibility to check your order again. If your order is ok, you can click on „Checkout“.
After you have gone through the checkout process, your license will be provisioned. Click on „Manage your Service“ to assign the license to your end users.
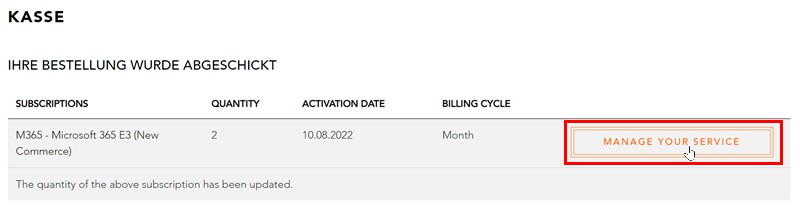
10.3.3.2 Cancel subscription count
To cancel the subscription click on the appropriate subscription.
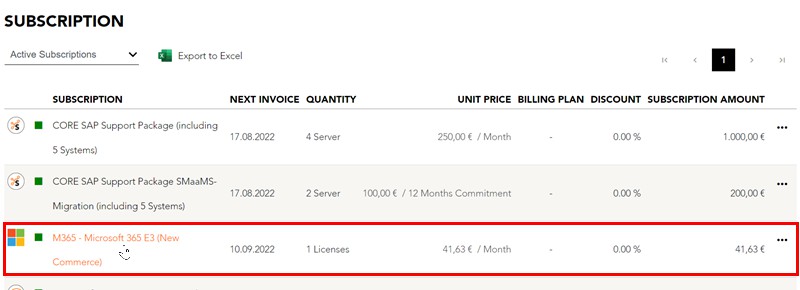
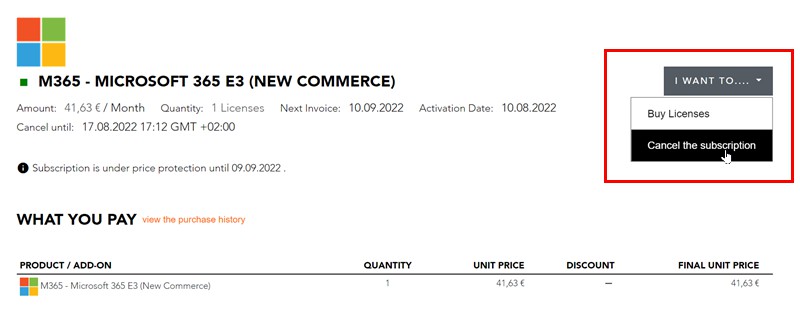
After you have selected your subscription, click on „I want….“ and then on „Cancel subscription“.
Note: To receive a refund, you must cancel licenses within 7 days of purchase or renewal.
Now you have the option to cancel the entire subscription or individual licenses.
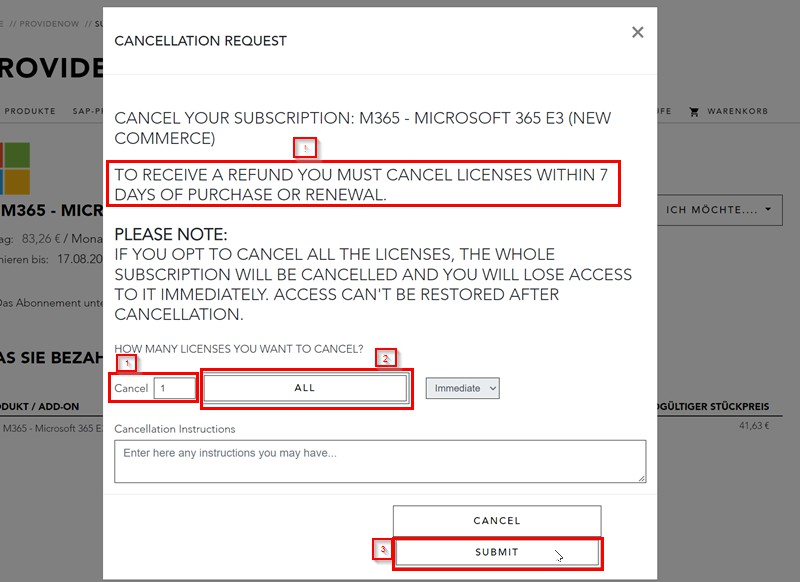
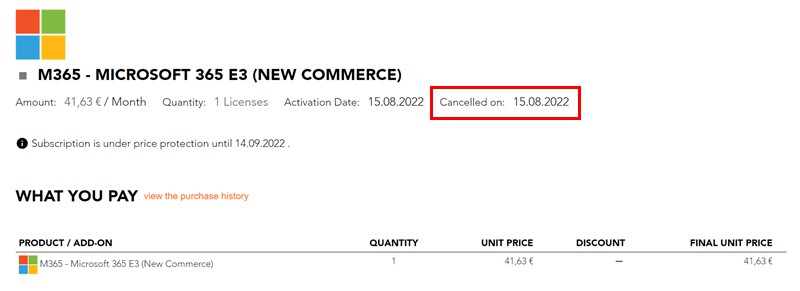
After you have performed the cancellation, you will see the cancellation date under „Deleted on:“.